There are two kinds of people in this world. People who can walk past a Reese’s Peanut Butter Cup without touching it. And people who are lying.
Chocolate and peanut butter is one of the great flavor combinations of all time — rich, creamy, slightly salty, deeply sweet, and somehow more satisfying than either ingredient is on its own. The problem with the original is obvious — a standard Reese’s cup contains 21g of sugar and enough refined ingredients to knock you straight out of ketosis before you have finished the wrapper.
These keto peanut butter cups fix all of that completely. Same chocolate shell. Same thick, creamy peanut butter filling. Same satisfying snap when you bite through the chocolate into the filling beneath. Zero refined sugar. Three grams of net carbs. Fifteen minutes of actual effort.
This is the keto dessert that makes people stop saying they miss candy. 🙂
Why This Recipe Works So Well
The Flavor Is Genuinely Indistinguishable From the Original
This is the claim that every healthy copycat recipe makes and most of them are lying. This one is not. The combination of good quality dark chocolate melted with coconut oil and a keto sweetener creates a shell that tastes rich, slightly bitter, and deeply chocolatey — exactly like the chocolate shell on a Reese’s. The peanut butter filling uses natural peanut butter, powdered sweetener, coconut flour, and a pinch of salt — the salt is the detail that makes everything taste like the real thing rather than a health food approximation of it. Together the result genuinely tastes like a Reese’s cup to everyone who tries it including people who are not eating keto.
The Technique Is Almost Embarrassingly Simple
Melt chocolate. Pour into molds. Freeze. Add peanut butter filling. Pour more chocolate. Freeze again. That is the entire recipe. There is no tempering, no candy thermometer, no complicated technique. If you can melt chocolate and stir peanut butter you can make these perfectly every single time.
They Keep for Weeks in the Freezer
Keto peanut butter cups freeze beautifully — they actually taste better eaten straight from the freezer where the chocolate shell has a satisfying snap and the peanut butter filling is firm and dense rather than soft. Make a large batch on Sunday and you have keto-friendly dessert and snack options available for two to three weeks with zero additional effort. This is the meal prep dessert that makes sticking to keto genuinely sustainable.
What Goes Into This Recipe
Keto Peanut Butter Cups (Healthier Reese’s, Ready in 15 Minutes)
Course: Dessert, SnacksCuisine: AmericanDifficulty: Easy12
cups15
minutes30
minutes160
kcalIngredients
200g sugar free chocolate chips (Lily’s) or 85%+ dark chocolate
1 tsp coconut oil
2 tbsp powdered erythritol or monk fruit sweetener
- For the peanut butter filling:
½ cup natural peanut butter (no added sugar — peanuts and salt only)
3 tbsp powdered erythritol or monk fruit sweetener
1–2 tbsp coconut flour (start with 1 tbsp, add more if needed)
½ tsp pure vanilla extract
Generous pinch of salt (more than you think — taste as you go)
- Optional finish:
Flaky sea salt for topping
Extra drizzle of melted chocolate for decoration
Directions
- Line a standard muffin tin with 12 paper cupcake liners or use a silicone muffin mold. For mini cups use a mini muffin tin with 24 liners or silicone mini mold.
- Melt chocolate and coconut oil together — microwave in 30 second intervals stirring between each until completely smooth. Add powdered sweetener and stir until dissolved. Let cool 2–3 minutes.
- Spoon approximately 1 teaspoon of melted chocolate into each liner. Tilt and rotate each liner to coat the sides slightly creating a cup shape. Place the tin in the freezer for 10 minutes until completely solid. Do not rush this step.
- While chocolate base freezes make the peanut butter filling — combine natural peanut butter, powdered sweetener, coconut flour, vanilla extract, and salt in a bowl. Mix thoroughly until completely combined. The filling should be firm enough to hold its shape when rolled into a ball. If too soft add more coconut flour one teaspoon at a time. Taste and adjust salt and sweetness.
- Remove molds from freezer. Roll filling into 12 small balls slightly smaller than the diameter of the cup — or press into flat discs. Place one piece of filling into each chocolate cup pressing gently to flatten. Leave a small gap at the top for the sealing chocolate layer.
- Spoon remaining melted chocolate over each filling — approximately 1 teaspoon per cup — spreading to the edges to completely seal the filling. If chocolate has firmed up reheat in 10 second microwave intervals until pourable again.
- Tap the mold gently on the counter to eliminate air bubbles and level the surface. Immediately scatter a tiny pinch of flaky sea salt over each cup before the chocolate sets.
- Return to freezer for 15–20 minutes until completely set and solid.
- Remove from freezer. Pop silicone cups out from the bottom or peel away paper liners. Eat immediately from frozen for the best texture and snap.
Dark chocolate or sugar free chocolate chips — the shell of the cup and the ingredient that sets the visual and flavor tone of the whole thing. You have two options here. Sugar free chocolate chips — brands like Lily’s are the most widely available and work perfectly — are the most convenient option and are specifically formulated to melt smoothly and taste like regular chocolate. Alternatively use 85%+ dark chocolate — technically not sugar free but very low in sugar with a deep, complex chocolate flavor that many people prefer to the sugar free versions. At 85% dark chocolate the sugar content per cup is low enough to fit comfortably into most keto macro goals. Avoid milk chocolate and anything below 70% cacao — the sugar content is too high for keto.
Natural peanut butter — the filling base and the ingredient that determines the texture of the finished cup more than anything else. Use natural peanut butter with no added sugar — ingredients should be peanuts and salt only. The natural oils in proper peanut butter create a smooth, creamy filling that sets to the right consistency in the freezer. Conventional peanut butter with added sugar and palm oil creates a different texture and adds unnecessary carbs. Stir the natural peanut butter thoroughly before using — the oil separation that happens in natural peanut butter needs to be fully incorporated for the filling to set evenly.
Powdered keto sweetener — powdered erythritol or powdered monk fruit sweetener mixed into both the chocolate and the peanut butter filling. Powdered is essential — granular sweetener does not dissolve in fat-based mixtures and creates a gritty texture in both the chocolate and the filling. If you only have granular sweetener blend it in a food processor for 30 seconds until completely fine and powdery before using. Taste as you go — sweetener preference is highly personal and the amount needed varies significantly between brands.
Coconut flour — a small amount added to the peanut butter filling. This is the ingredient that transforms the filling from a soft, almost liquid peanut butter layer into something with the thick, dense, slightly dry texture of a Reese’s filling. Coconut flour absorbs moisture very efficiently — even one tablespoon makes a significant difference to the consistency of the filling. Start with one tablespoon and add more if the filling seems too soft and sticky. The filling should be firm enough to roll into balls or press into a disc shape without sticking to your fingers.
Coconut oil — added to the melted chocolate in a small amount. Coconut oil thins the melted chocolate slightly making it more pourable and giving it a smoother, shinier finish when set. It also lowers the melting point of the chocolate slightly — which means the cups melt a little faster at room temperature but have a more satisfying snap when eaten cold from the freezer. One teaspoon per 100g of chocolate is the right amount — enough to improve the texture without making the chocolate too soft.
Vanilla extract — half a teaspoon added to the peanut butter filling. The same principle as always — vanilla adds warmth and depth that makes the filling taste more complex and less one-dimensional. Not identifiable as vanilla but very noticeable when it is missing.
Salt — the single most important ingredient in the peanut butter filling and the detail that makes these taste like Reese’s rather than just chocolate and peanut butter. A generous pinch of flaky sea salt added to the filling — and optionally a tiny pinch scattered over the top of the finished cups — activates every flavor in the cup and creates the specific sweet-salty balance that makes Reese’s so addictive. Do not be shy with the salt. Natural peanut butter without added salt needs more salt added than you might expect.
Silicone muffin molds or cupcake liners — the equipment that determines the shape and size of the finished cups. A standard silicone mini muffin mold creates the most Reese’s-accurate shape — small, perfectly round cups with straight sides. Regular silicone muffin molds create larger cups that are more substantial and satisfying as a dessert portion. Paper cupcake liners placed in a muffin tin work well too — peel them away after freezing for the classic Reese’s look. Mini cupcake size most closely replicates the original Reese’s cup size.
The Chocolate Shell — Getting It Right
The chocolate shell has two layers — a bottom layer that forms the base and sides of the cup and a top layer that seals the peanut butter filling inside. Getting both layers right is what creates the professional, uniform appearance of a proper peanut butter cup.
Melting the chocolate — use a double boiler or microwave. For the microwave method — add chocolate chips and coconut oil to a microwave-safe bowl. Microwave in 30 second intervals stirring between each interval until completely melted and smooth. Do not microwave for more than 30 seconds at a time — chocolate burns quickly and burnt chocolate cannot be rescued. Three to four 30-second intervals is typically enough for 150g of chocolate.
The bottom layer — pour approximately one teaspoon of melted chocolate into each mold and tilt the mold to spread the chocolate up the sides creating a cup shape rather than just a flat disc. This side coating is what creates the characteristic cup shape of a Reese’s. Alternatively use the back of a spoon to push the chocolate up the sides. Freeze for ten minutes until completely solid before adding the filling — a soft bottom layer will mix with the filling rather than staying as a distinct layer.
The top layer — pour melted chocolate over the set peanut butter filling — approximately one teaspoon per cup — and tilt the mold to spread it to the edges so the filling is completely sealed. Tap the mold gently on the counter to settle the chocolate and eliminate air bubbles. Freeze for fifteen minutes until completely set.
The temperature of the chocolate — use the chocolate when it is fully melted and smooth but not hot. Very hot chocolate can melt the frozen bottom layer when you add the filling layer and the layers will bleed into each other rather than staying distinct. Let the chocolate cool for two to three minutes after melting before using.
The Peanut Butter Filling — The Perfect Consistency
The filling consistency is the most important variable in this recipe. Too soft and it spreads into the chocolate layers rather than staying as a distinct filling. Too firm and it is dry and crumbly rather than smooth and creamy.
The correct consistency is firm enough to hold its shape when rolled into a small ball or pressed into a disc — it should not stick excessively to your fingers and should not slump or spread at room temperature. It should feel similar to stiff cookie dough.
If the filling is too soft — add more coconut flour one teaspoon at a time, mixing thoroughly between each addition. Refrigerate for ten minutes and test the consistency again. Continue until it holds its shape.
If the filling is too firm and crumbly — add natural peanut butter one teaspoon at a time and mix thoroughly. The filling should become smoother and more pliable with each addition.
The filling should taste noticeably saltier and sweeter than you want the finished cup to taste — the chocolate shell moderates both the saltiness and sweetness significantly. Season the filling boldly before assembling.
Assembly — Step by Step for Perfect Cups
Step one — melt chocolate with coconut oil until completely smooth. Let cool two to three minutes.
Step two — spoon approximately one teaspoon of melted chocolate into each mold. Tilt and rotate to coat the sides. Freeze ten minutes until completely solid.
Step three — while the chocolate base freezes make the peanut butter filling. Combine natural peanut butter, powdered sweetener, coconut flour, vanilla extract, and salt. Mix until completely combined and firm enough to hold its shape.
Step four — remove molds from freezer. Roll filling into small balls slightly smaller than the diameter of the mold — or press into flat discs. Place one piece of filling into each chocolate cup pressing gently to flatten slightly. The filling should not reach the very top of the chocolate cup — leave a small gap for the top chocolate layer to seal it.
Step five — pour melted chocolate over the filling in each cup. Approximately one teaspoon per cup. Tilt the mold to spread the chocolate to the edges completely sealing the filling. Tap gently on the counter.
Step six — optional — scatter a tiny pinch of flaky sea salt over the top of each cup immediately before the chocolate sets. This is the detail that makes these look professional and taste extraordinary.
Step seven — freeze for fifteen to twenty minutes until completely set. Remove from molds by pushing up from the bottom of silicone molds or peeling away paper liners.
Step eight — eat immediately from frozen for the best texture — or store in the freezer for up to three weeks.
Size Variations — Mini vs Regular vs Large
Mini cups — use a silicone mini muffin mold or mini cupcake liners. Makes approximately 24 cups. Each cup is one to two bites — the most Reese’s-accurate size and the best option for portion control. At this size each cup contains approximately 80 calories and 2g net carbs.
Regular cups — use a standard silicone muffin mold or regular cupcake liners. Makes approximately 12 cups. Each cup is a proper dessert portion — more substantial and satisfying than the mini version. At this size each cup contains approximately 160 calories and 3g net carbs.
Large slab version — line a small baking dish with parchment paper. Pour half the chocolate in the bottom, freeze, add the entire peanut butter filling in an even layer, pour remaining chocolate over the top, freeze, then cut into squares. This slab version is the easiest and fastest approach — no individual molds, no portion sizing during assembly. Cut into squares of whatever size you want after freezing.
Flavor Variations to Keep Things Interesting
Almond butter cups — replace peanut butter with natural almond butter. The filling is slightly less dense and more delicate in flavor — almost like a sophisticated adult version of the original. Works beautifully with dark chocolate.
Chocolate hazelnut cups — mix two tablespoons of unsweetened cocoa powder into the peanut butter filling along with the other filling ingredients. Creates a chocolate-on-chocolate cup that tastes like a keto Ferrero Rocher situation. Add a single whole hazelnut in the center of the filling before sealing with the top chocolate layer.
White chocolate peanut butter cups — use sugar free white chocolate chips for the shell instead of dark chocolate. The visual of white chocolate with peanut butter filling is striking and different from the classic version. Top with a drizzle of dark chocolate for a two-tone visual effect.
Coconut peanut butter cups — mix two tablespoons of unsweetened shredded coconut into the peanut butter filling. Add a tiny amount of coconut extract to the filling. The result tastes like a keto Mounds bar crossed with a Reese’s — genuinely excellent.
Spicy chocolate peanut butter cups — add a tiny pinch of cayenne pepper and half a teaspoon of cinnamon to the melted chocolate. The warmth of the cayenne amplifies the chocolate flavor dramatically and creates an unexpected complexity that makes these taste genuinely sophisticated.
Strawberry peanut butter cups — add a small amount of freeze-dried strawberry powder to the peanut butter filling for a strawberry-peanut butter-chocolate combination that is sweet, slightly tart, and visually beautiful with the pink filling visible when you bite through the chocolate.
Storing and Serving
Freezer — the best storage method and the best serving temperature. Store in a zip-lock freezer bag or airtight container in the freezer for up to three weeks. Eat directly from frozen — the chocolate has the best snap and the filling is the best consistency straight from the freezer. They are genuinely better frozen than at room temperature.
Fridge — store for up to one week in an airtight container. At fridge temperature the chocolate is slightly softer and the filling is creamier — a different but equally pleasant texture to the frozen version.
Room temperature — the cups will soften significantly at room temperature, especially in summer heat. The chocolate becomes soft and the filling spreads slightly. Eat within twenty minutes of removing from the fridge or freezer if serving at room temperature.
Transporting — keep in an insulated bag with an ice pack if transporting to a party or gathering. These do not travel well in summer heat without refrigeration.
The Nutritional Numbers — Why This Fits Keto
Per regular-sized cup (using sugar free chocolate and erythritol):
Calories — approximately 160 Fat — approximately 14g Total carbs — approximately 6g Fiber — approximately 2g Sugar alcohols — approximately 1g Net carbs — approximately 3g Protein — approximately 4g
Three grams of net carbs per cup is comfortably within keto macro guidelines. The fat content is high which actively supports ketosis. The protein content is modest but meaningful. And the calorie count is reasonable for a dessert that tastes as indulgent as this one.
Compare this to a standard Reese’s cup — 110 calories per cup but 21g of sugar and 12g of total carbs with minimal fiber. The keto version has slightly more calories from fat but dramatically fewer carbs and zero refined sugar. For anyone on keto the trade is an obvious win.
Common Mistakes to Avoid
Using granular sweetener instead of powdered. Granular sweetener in a fat-based filling creates a gritty, sandy texture that is unpleasant and impossible to fix after mixing. Always use powdered sweetener — or blend granular to a powder first.
Not freezing the bottom layer before adding filling. If the chocolate base is not completely solid when you add the filling the two layers bleed into each other. Ten minutes in the freezer is the minimum — do not rush this step.
Making the filling too soft. Soft filling spreads into the chocolate and creates cups without a distinct filling layer. The filling must be firm enough to hold its shape at room temperature. If it is sticking to your fingers and spreading — add more coconut flour.
Using sweetened or commercial peanut butter. Added sugar and palm oil change the texture and carb count of the filling significantly. Natural peanut butter with peanuts and salt only is non-negotiable for a proper keto version.
Overheating the chocolate. Burnt chocolate is grainy, bitter, and cannot be saved. Microwave in 30-second intervals only and stir between each. The chocolate is done when it is smooth and fully melted — not when it looks almost melted. Residual heat finishes the melting after you stop microwaving.
Skipping the salt. The salt is what makes these taste like Reese’s rather than just chocolate and peanut butter. Natural peanut butter without added salt needs more seasoning than you expect. Season the filling generously and taste before assembling.
Making It Look Good for Pinterest
Keto peanut butter cups photograph beautifully with minimal effort — the combination of dark chocolate and golden peanut butter is one of the most visually appealing color combinations in food photography.
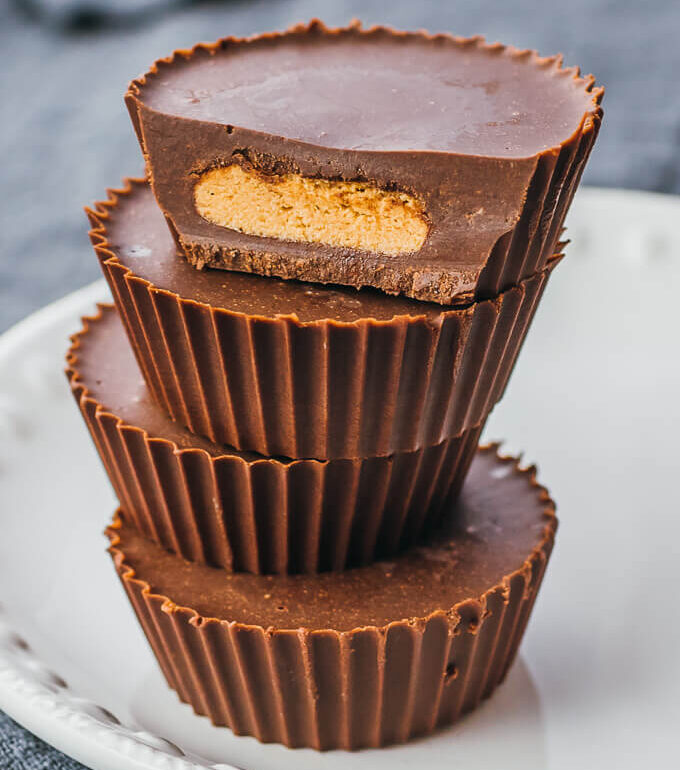
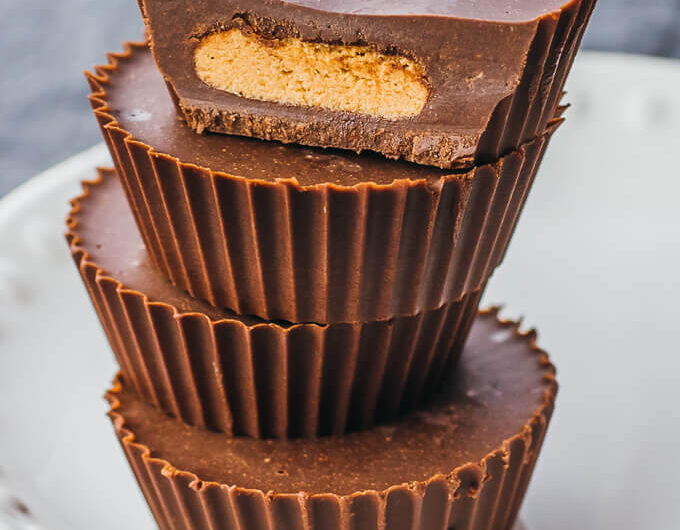
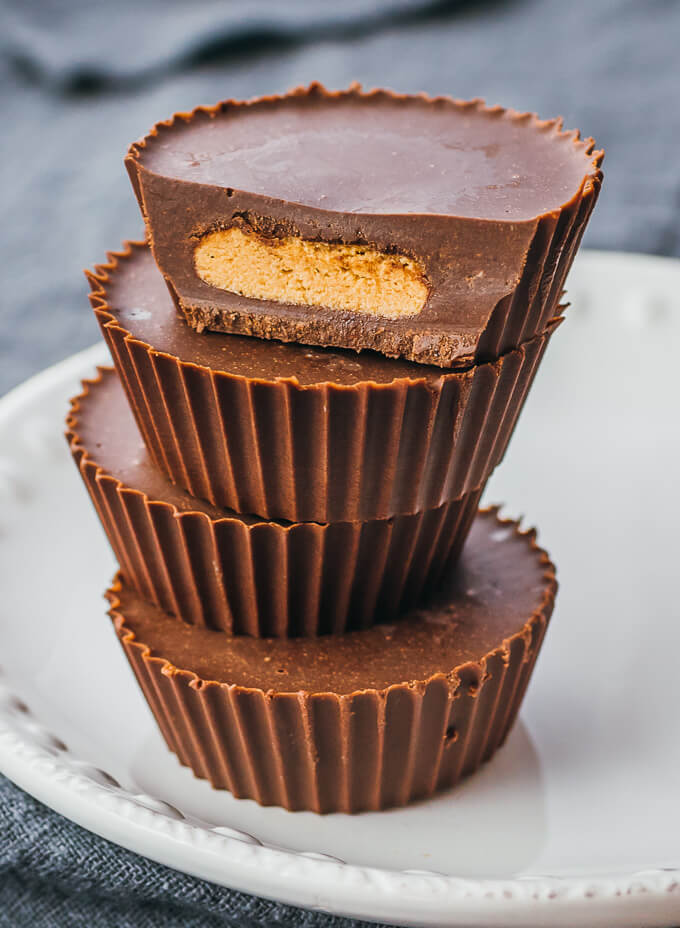
The cross-section shot — bite one cup in half and photograph the cut surface showing the distinct chocolate shell and peanut butter filling layers. This is the most popular food photography angle for filled chocolate confections and consistently performs well on Pinterest. The layers must be clean and distinct — which is why the freezing steps between layers matter so much.
The stack shot — stack three to four cups slightly offset from each other and photograph from a slight angle. The stack creates visual height and dimension that a single cup cannot achieve.
Natural light always — dark chocolate photographs beautifully in natural window light and looks flat and slightly grey under artificial lighting.
A sprinkle of flaky salt on top — scatter a pinch of flaky sea salt over the surface of the cups right before photographing. The white salt crystals against the dark chocolate surface add visual texture and signal the sweet-salty quality of the cup immediately to anyone scrolling.
White or marble background — the dark chocolate against a light surface creates maximum contrast and makes the cups look striking and professional.
Final Thoughts
Giving up sugar does not mean giving up the things you love. It means finding better versions of them — versions that taste just as good, satisfy the same cravings, and leave you feeling completely fine afterward rather than guilty and sluggish.
These keto peanut butter cups are exactly that. Fifteen minutes. Three grams of net carbs. The chocolate-peanut butter satisfaction of a Reese’s without a single gram of refined sugar.
Make a batch this weekend. Store them in the freezer. Eat one every time you want something sweet.
And quietly enjoy the fact that your keto dessert tastes better than most people’s cheat day treats. 🙂