No Bake Strawberry Cheesecake Jars (Easy, Creamy & Ready in 15 Minutes)
Some desserts look like they took hours. Some desserts actually took hours. These strawberry cheesecake jars are firmly in the first category — and that is exactly why they’re one of the best recipes you’ll make this summer.
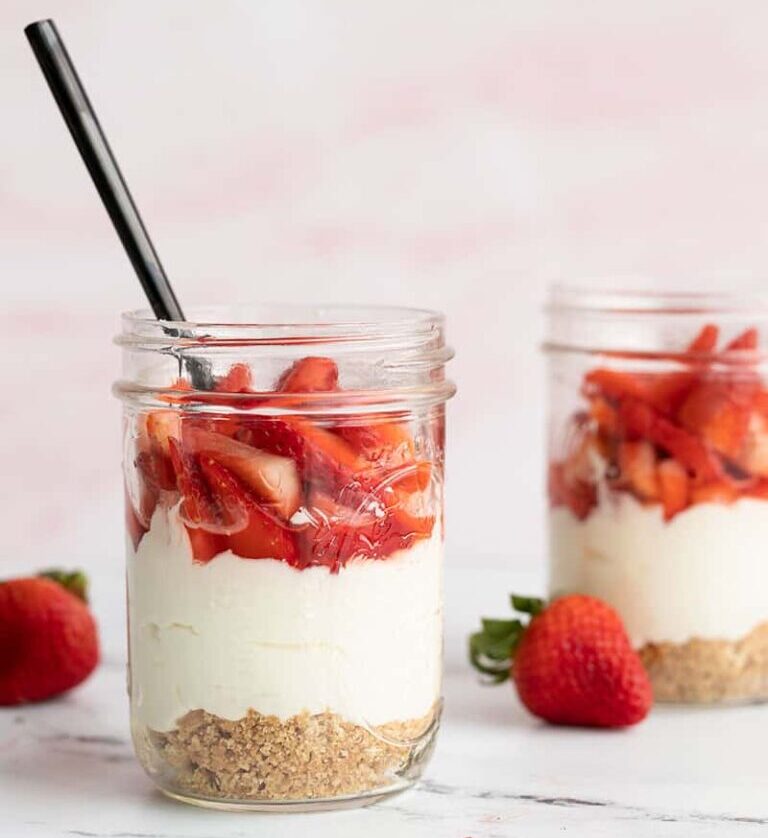
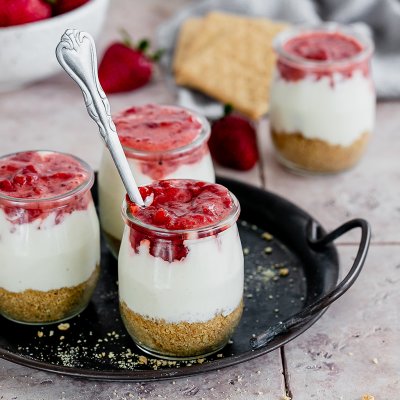
Creamy cheesecake filling. Buttery graham cracker base. Fresh, juicy strawberries piled on top. All layered beautifully in individual jars that look like something from a bakery window — and take fifteen minutes and zero oven time to put together.
No baking. No water bath. No praying your cheesecake doesn’t crack. Just a bowl, a hand mixer, a few jars, and a fridge. That’s it.
Whether you’re making these for a dinner party, a cookout, a date night dessert, or just a Tuesday when you want something that feels a little special — this recipe delivers every single time. 🙂
Why You’re Going to Love This Recipe
It Looks Wildly Impressive for Almost Zero Effort
There’s a very specific kind of satisfaction that comes from putting something on the table that looks like it came from a restaurant and watching people’s reactions before they know how easy it was. These jars do that every time. The layers are visible through the glass, the strawberries are bright and beautiful on top, and the individual jar format makes it look intentional and polished in a way that a slice of regular cheesecake just doesn’t. Nobody needs to know it took fifteen minutes. That’s between you and HerGlowDiary.
Individual Jars Mean Zero Stress at the Table
No slicing. No serving spatulas. No cheesecake falling apart the moment you try to plate it. Each person gets their own jar — already perfectly portioned, already beautifully presented, ready to eat with a long spoon straight from the glass. For parties and gatherings this is genuinely one of the most practical dessert formats you can choose. For meal prep it’s even better — make four or five jars on Sunday and you have individual desserts ready in the fridge all week.
The No Bake Method Actually Makes It Better
Traditional cheesecake is baked, which means eggs, water baths, cooling time, and the constant anxiety of cracking. No bake cheesecake skips all of that and delivers a filling that is actually creamier, lighter, and more mousse-like than its baked counterpart. The texture is somewhere between cheesecake and whipped cream — thick enough to hold its shape, light enough to feel completely effortless to eat. For summer especially, that lighter texture is exactly what you want.
No Bake Strawberry Cheesecake Jars (Easy, Creamy & Ready in 15 Minutes)
Course: DessertCuisine: AmericanDifficulty: Easy4
servings15
minutes1
hour320
kcalIngredients
For the crumb base:
8 graham crackers or digestive biscuits (approximately 120g)
3 tbsp melted coconut oil or unsalted butter
1 tsp honey (optional)
- For the cheesecake filling:
225g full fat cream cheese, room temperature
½ cup full fat plain Greek yogurt
3 tbsp honey or maple syrup (adjust to taste)
1 tsp pure vanilla extract
Zest of ½ lemon
1 tsp fresh lemon juice
- For the topping:
300g fresh strawberries, hulled and sliced
1 tbsp honey for drizzling
4 whole strawberries with hulls for garnish
- Optional strawberry sauce:
½ cup fresh strawberries
1 tsp honey
Squeeze of fresh lemon juice
Directions
- Remove cream cheese from the fridge at least 30–45 minutes before starting. Room temperature cream cheese is non-negotiable for a smooth, lump-free filling.
- Make the crumb base — pulse graham crackers in a blender until they form fine, even crumbs. Transfer to a bowl and add melted coconut oil and honey if using. Mix until the crumbs are evenly coated and hold together when pressed between your fingers.
- Divide the crumb mixture evenly between four jars — approximately 2–3 tablespoons per jar depending on jar size. Press down firmly with the back of a spoon to compact into an even layer. Place jars in the fridge while you make the filling.
- Make the filling — beat room temperature cream cheese with a hand mixer on medium speed for 60–90 seconds until completely smooth and fluffy. Scrape down the sides of the bowl.
- Add Greek yogurt, honey, vanilla extract, lemon zest, and lemon juice. Beat on medium speed until just smooth and combined — do not over-mix. Taste and adjust sweetness or lemon to your preference.
- Remove jars from the fridge. Spoon or pipe the cheesecake filling evenly over the crumb base in each jar. Smooth the tops with the back of a spoon. Tap each jar gently on the counter to settle the filling and remove air pockets.
- Cover jars loosely with plastic wrap and refrigerate for at least 1 hour — 2 hours is better. The filling will firm up and the flavors will develop beautifully.
- If making strawberry sauce — blend ½ cup fresh strawberries with honey and lemon juice until completely smooth. Set aside.
- Right before serving, arrange sliced strawberries over the top of each jar in overlapping layers. Place one whole strawberry with the green hull in the center. Drizzle with honey or strawberry sauce.
- Serve immediately with a long spoon. These are best eaten straight from the jar.
What Goes Into These Jars
Full fat cream cheese — the foundation of the filling. Must be at room temperature before you start — cold cream cheese doesn’t beat smoothly and leaves lumps in the filling no matter how long you mix it. Take it out of the fridge at least 30–45 minutes before making this recipe. Full fat gives you the richest, most indulgent flavor and the firmest set. Low fat cream cheese is more watery and the filling won’t hold its shape as well.
Full fat Greek yogurt — replaces the heavy cream you’d find in most no bake cheesecake recipes. Greek yogurt adds a subtle tanginess that makes the filling taste more genuinely like cheesecake, adds a meaningful protein boost, and creates a slightly lighter texture than cream alone. Use full fat for the creamiest result — low fat Greek yogurt is more watery and thins the filling.
Honey or maple syrup — the natural sweetener that keeps this recipe refined sugar free without compromising on flavor. Honey adds a floral sweetness that pairs beautifully with strawberries. Maple syrup adds a deeper, slightly caramel note. Both work perfectly. Start with less than you think you need, taste, and add more — sweetness preference is personal and the strawberries will add additional sweetness on top.
Lemon zest and lemon juice — the ingredient that elevates this from good to genuinely excellent. A small amount of fresh lemon zest in the filling adds a bright citrus note that cuts through the richness of the cream cheese and makes the strawberry flavor on top taste even more vibrant by contrast. Fresh lemon only — bottled lemon juice is flat and slightly bitter in cold preparations.
Pure vanilla extract — half a teaspoon, non-negotiable. Vanilla deepens the cheesecake flavor and adds warmth that makes the filling taste more complex and sophisticated. Use pure extract not imitation.
Graham crackers or digestive biscuits — crushed into fine crumbs for the base layer. The crumb base adds crunch, structure, and that classic cheesecake flavor contrast against the creamy filling. Pulse in a blender for the finest, most even crumb — or place in a zip-lock bag and crush with a rolling pin if you don’t have a blender. Either works perfectly.
Coconut oil or butter — just enough to bind the crumbs together so the base holds its shape when you spoon filling on top. Melted coconut oil keeps the recipe dairy free for the base layer and adds a subtle coconut note that works well with strawberries. Melted butter gives a more classic, richer graham cracker crust flavor. Both are excellent.
Fresh strawberries — the star of the whole jar. Use the best, ripest strawberries you can find — deep red all the way to the tip, intensely fragrant, and slightly soft to the touch. Hull and slice them thinly so they layer beautifully on top of the filling. Reserve a few whole ones with their green hulls for garnishing — the contrast of a whole strawberry sitting on top of a jar looks stunning in photos.
Optional strawberry sauce — if you want to take these jars completely over the top, make a quick two-minute strawberry sauce by blending a handful of fresh strawberries with a teaspoon of honey and a squeeze of lemon juice until smooth. Drizzle over the top of the sliced strawberries right before serving. It adds color, flavor intensity, and a glossy finish that makes these look genuinely professional.
The Filling Technique That Makes It Perfect

The filling is where most people go wrong with no bake cheesecake — either it’s too thin and doesn’t hold its shape, or it’s too stiff and feels dense and heavy rather than light and creamy. Here’s exactly how to get it right.
Start with room temperature cream cheese — this cannot be emphasized enough. Cold cream cheese will never beat completely smooth no matter how long you mix it. You’ll end up with tiny lumps in the filling that ruin the texture. Room temperature, always.
Beat the cream cheese alone first — before adding anything else — until it is completely smooth and fluffy. This takes about 60–90 seconds with a hand mixer on medium speed. Scrape down the sides of the bowl halfway through. Only once the cream cheese is perfectly smooth should you add the Greek yogurt, honey, lemon, and vanilla.
Beat together until just combined — don’t over-mix. Over-mixing incorporates too much air and can make the filling slightly grainy in texture after it sets. Mix until smooth and uniform then stop.
Taste before assembling. This is your only chance to adjust sweetness, lemon, or vanilla before it goes into the jars. The filling should taste slightly sweeter than you want the finished dessert to be — the tartness of the strawberries on top will balance it out.
How to Layer the Jars Perfectly
The layering order and technique determines how beautiful these look through the glass — and since the whole point of jar desserts is that visible layered presentation, this is worth doing properly.
Use clear glass jars or glasses — mason jars, small drinking glasses, or wide-mouth jam jars all work beautifully. The diameter matters more than the height — a wider jar shows off the layers better and is easier to eat from than a tall, narrow one.
Add the crumb base first — about two to three tablespoons per jar. Press it down gently with the back of a spoon to compact it slightly. A compacted base holds together better when you spoon the filling on top and gives a cleaner layer separation.
Add the filling next — use a piping bag fitted with a round tip for the cleanest, most professional result. If you don’t have a piping bag, a zip-lock bag with one corner snipped off works perfectly. Pipe or spoon the filling in a smooth, even layer over the crumb base. Tap the jar gently on the counter to settle the filling and remove any air pockets.
Add the strawberries last — right before serving for the freshest appearance and best texture. Arrange sliced strawberries in overlapping layers across the top of the filling. Place one whole strawberry with the green hull in the center of the top for the most Pinterest-worthy presentation. Drizzle with strawberry sauce or honey right before photographing and serving.
Make It Healthier Without Losing Any of the Deliciousness
High protein version — replace cream cheese entirely with full fat cottage cheese blended completely smooth. The texture is remarkably similar to cream cheese filling and the protein content jumps to approximately 12–15g per jar. Add Greek yogurt as normal. Most people genuinely cannot tell this isn’t cream cheese once it’s set and flavored.
Lower sugar version — use powdered monk fruit or erythritol instead of honey. Replace graham crackers with a base made from blended dates, rolled oats, and almond flour pulsed together — naturally sweet, no refined sugar, genuinely delicious.
Dairy free version — use dairy free cream cheese, coconut yogurt instead of Greek yogurt, and coconut oil for the base. The filling is slightly less firm but still delicious. Chill for longer — at least two hours — to help it set properly.
Gluten free version — replace graham crackers with gluten free oat cookies or a mixture of almond flour, rolled oats, and coconut oil pressed together. Same crunch, same buttery base flavor, completely gluten free.
Common Mistakes to Avoid
Using cold cream cheese. The single most common mistake. Cold cream cheese will not beat smooth. It stays lumpy regardless of how long you mix it. Always bring to room temperature before starting — 30–45 minutes on the counter minimum.
Adding strawberries too far in advance. Fresh strawberries release moisture as they sit on top of the filling. Add them right before serving — not the night before. If you assemble the jars in advance, keep the strawberry topping separate and add it within an hour of serving.
Not compacting the crumb base. A loose, uncompacted base falls apart the moment you spoon filling on top and the layers lose their clean separation. Press the crumb base down firmly with the back of a spoon before adding filling.
Over-mixing the filling. Once the cream cheese is smooth and the other ingredients are added, mix only until just combined. Over-mixing makes the filling slightly grainy after setting and can cause it to be too soft to hold its shape properly.
Using low fat cream cheese. More water content, less richness, filling that doesn’t hold its shape. Full fat always for no bake cheesecake.
Not chilling long enough. The filling needs at least one hour in the fridge to set properly — two hours is better. Serving immediately after assembling gives you a filling that’s too soft and doesn’t hold its shape when you spoon into it.
Variations to Try All Summer
Strawberry lemon version — add an extra teaspoon of lemon zest to the filling and top with a lemon curd layer between the filling and the strawberries. The combination of lemon cheesecake and fresh strawberry is one of the great summer flavor pairings.
Chocolate strawberry version — add a layer of melted dark chocolate over the graham cracker base before adding the filling. Let it set for 10 minutes in the fridge before adding the cheesecake layer. Chocolate, cheesecake, and fresh strawberry in every bite — genuinely outstanding.
Strawberry basil version — add two or three fresh basil leaves finely chopped into the sliced strawberry topping with a squeeze of lemon. Sounds unusual, tastes sophisticated and summery in a way that surprises everyone.
Mixed berry version — use a combination of fresh strawberries, blueberries, and raspberries for the topping. More color, more flavor complexity, and the mixed berry presentation looks absolutely stunning through clear glass.
Oreo base version — replace graham crackers with crushed Oreos for a cookies and cream cheesecake jar situation. Use chocolate sandwich cookies blended to fine crumbs mixed with melted coconut oil. The contrast of dark cookie base, white creamy filling, and bright red strawberries is visually spectacular.
Perfect Occasions for These Jars
These jars work for essentially every summer occasion — but here’s where they really shine.
Dinner parties — make them the night before, keep refrigerated without the strawberry topping, add strawberries an hour before guests arrive. Zero day-of stress, maximum impression.
Cookouts and BBQs — transport jars sealed with lids. Add strawberry topping on arrival. Portable, individual, no serving equipment needed.
Date night dessert — two jars, candlelight, done. Looks significantly more thoughtful and impressive than it was difficult to make.
Meal prep desserts — make four or five jars on Sunday without the strawberry topping. Keep refrigerated for up to three days. Add fresh strawberries each day before eating. Dessert sorted for the entire week.
Kids’ treats — kids love eating from their own individual jar and the cheesecake filling is sweet and mild enough that even picky eaters tend to love it.
Final Thoughts
No bake strawberry cheesecake jars are one of those recipes that earns a permanent spot in your repertoire the first time you make them. They’re easy enough for a weeknight, impressive enough for guests, light enough for summer, and flexible enough to customize endlessly.
Fifteen minutes. A handful of ingredients. Individual jars that look like they came from a dessert bar.
Make them this weekend. Photograph them by the window. Watch them disappear faster than you expected. 🙂