Imagine stepping into a vintage, neon-lit 1950s soda fountain on a sweltering July afternoon. The air is thick with the comforting aroma of toasted sugar, waffle cones crisping on the iron, and the sharp, bright scent of freshly sliced strawberries. The bell above the door chimes as a colossal glass boat slides across the marble counter, piled high with three perfect scoops of ice cream, a split caramelized banana, a torrential downpour of warm hot fudge, and a bright neon cherry perched proudly on a mountain of whipped cream. Your spoon cuts through the layers, capturing the perfect, unified harmony of rich chocolate, fruity brightness, and velvety cream.
Now, close your eyes and compress that exact, multi-layered explosion of nostalgic bliss into a single, elegant, bite-sized masterpiece. As your teeth break through the delicate, paper-thin crinkle crust of these brownie bites, they sink into an intensely dense, fudgy, and decadent chocolate core. Just as the rich cocoa begins to coat your palate, it is beautifully interrupted by a hidden, sweet burst of real banana and a bright, tangy swirl of strawberry glaze.
The best part? You don’t need to drag out heavy ice cream makers, deal with rapidly melting bowls, or spend hours washing structural pastry tools. This entire recipe comes together using standard pantry staples, a single mixing bowl, and a basic mini-muffin pan. In less than thirty minutes, you can transform everyday ingredients into a sophisticated, portion-controlled dessert that delivers maximum retro joy with absolute modern simplicity.
3. Introduction: What Are Banana Split Brownie Bites?
At its core, a Banana Split Brownie Bite is a culinary reimagining of America’s most iconic ice cream sundae, engineered specifically for the modern lifestyle. Instead of utilizing a traditional cakey or dry brownie base, this recipe acts as an intensive, hyper-fudgy chocolate vessel. The bite itself is a structural marvel: a miniature, intensely dark chocolate brownie cup that houses a pocket of real, caramelized banana puree, topped with a delicate piping of vanilla bean cream, a drizzle of glossy strawberry reduction, a scatter of toasted nuts, and a tiny, ruby-red cherry accent.
Unlike traditional large-format brownies that require careful slicing, cooling, and messy handling, these bites are entirely self-contained. They offer a luxurious, multi-textured dessert experience where every single element of a classic banana split is perfectly proportioned in a single mouthful. The texture balances the structural crunch of the exterior crust with a meltingly soft, dense interior, immediately followed by the silky smoothness of the toppings and the clean crunch of toasted nuts.
From a lifestyle perspective, this dessert is a game-changer. It delivers an incredibly premium, high-end bakery appearance while remaining completely free of artificial stabilizers or complex molecular ingredients. Because they are naturally portion-controlled, they allow you to indulge in a genuinely rich, deep-chocolate dessert without the accidental overconsumption that comes with a massive, unstructured tray of sliced brownies. It is elegant storytelling disguised as a casual party snack.
4. “Why This Recipe Is Better” Section
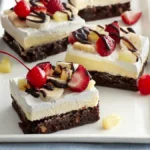
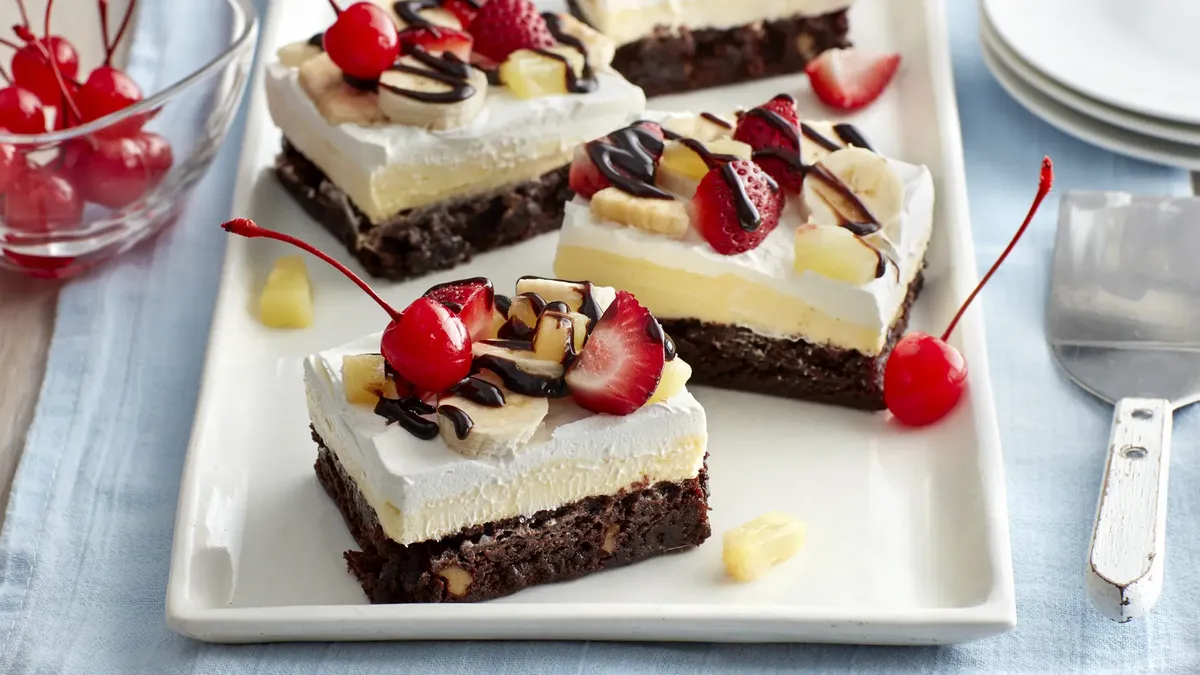
Banana Split Brownie Bites
Ingredients
- ½ cup 1 stick Unsalted Butter, melted and cooled slightly
- ½ cup White Granulated Sugar
- ½ cup Light Brown Sugar packed
- 2 Large Eggs Must be absolute room temperature
- 1 tsp Pure Vanilla Extract
- ½ cup deeply speckled Banana mashed completely smooth (approx. 1 medium banana)
- ½ cup Dutch-Processed Cocoa Powder Sifted to remove lumps
- ½ cup All-Purpose Flour
- ¼ tsp Fine Sea Salt
- ½ cup Mini Semi-Sweet Chocolate Chips Optional, for extra texture
For the Classic Sundae Toppings:
- 1 cup Heavy Whipping Cream Cold or prepared stabilized whipped topping
- 2 tbsp Powdered Sugar For the cream
- ¼ cup Premium Strawberry Syrup or thick strawberry reduction
- ¼ cup High-Gloss Chocolate Fudge Syrup
- 3 tbsp Roasted Peanuts or Walnuts finely chopped
- 24 Maraschino Cherries thoroughly drained and patted completely dry with paper towels
Instructions
- Step 1: Pre-Heating and Pan Calibration
- Position your oven rack directly in the center position and preheat your oven to 350°F (175°C). Take your 24-count non-stick mini-muffin pan and spray the cavities thoroughly with a high-quality baking spray that contains real flour, or use a paper towel dipped in melted butter to lubricate each well perfectly.
- Step 2: The Critical Sugar-Egg Emulsion
- In a large glass mixing bowl, combine your room-temperature eggs, white granulated sugar, and light brown sugar. Using a sturdy hand whisk or an electric hand mixer on medium-high speed, beat the mixture aggressively for a full 3 to 4 minutes. The mixture will double in volume, turn an incredibly pale cream color, and form thick ribbons when the beaters are lifted. This step dissolves the sugar crystals and guarantees your shiny crinkle-top.
- Step 3: Integrating the Aromatics and Fruit
- Pour your slightly cooled melted butter, pure vanilla extract, and the completely smooth mashed banana directly into the egg mixture. Whisk gently for 30 seconds until the fats and fruit are fully integrated into the egg foam.
- Step 4: Folding the Dry Architecture
- Place a fine-mesh sieve over your wet bowl and add the Dutch-processed cocoa powder, all-purpose flour, and sea salt. Sift them directly in to eliminate any stubborn cocoa lumps. Put away your electric mixer and pick up a flexible silicone spatula. Gently fold the dry ingredients into the wet mixture using a sweeping figure-eight motion just until the flour streaks vanish. Do not over-mix. Fold in the mini chocolate chips if using.
- Step 5: Precision Portioning and Baking
- Using your 1-tablespoon trigger cookie scoop, drop exactly one level scoop of batter into each prepared cavity of your mini-muffin pan. Each well should be roughly three-quarters full. Slide the pan into the preheated oven and bake for precisely 11 to 13 minutes.
- Step 6: The Double-Tap and Cool Down
- At the 12-minute mark, check the bites with a toothpick; it should emerge with a few moist crumbs clinging to it. Pull the pan from the oven and immediately slam it flat against your counter twice to sink the centers. Let the brownie bites sit completely undisturbed in the hot pan for 15 minutes to allow their structural walls to set. Gently lift them out and place them onto a wire cooling rack to reach absolute room temperature.
- Step 7: The Masterful Assembly
- Whip your cold heavy cream and powdered sugar together in a chilled bowl until stiff peaks form, then transfer it into a pastry bag fitted with a star tip. Pipe a clean, beautiful star rosette directly into the sunken center of each cooled brownie bite. Drizzle with a delicate zigzag pattern of chocolate and strawberry syrups. Sprinkle the finely chopped roasted nuts across the cream, and top each bite with a single, dry maraschino cherry. Serve immediately or chill.
Image Credit: bettycrocker.com
The Mastery of High-Definition Fudginess
Most standard brownie recipes rely on heavy amounts of baking powder or chemical leaveners, which introduce tiny pockets of air into the batter. While this works well for a cake-like texture, it absolutely ruins a brownie bite, turning it dry, spongy, and uninspired. This recipe completely eliminates chemical leaveners. Instead, we rely on the mechanical emulsification of melted butter, high-quality cocoa fats, and precise sugar-egg whisking to achieve a dense, fudgy, and almost truffle-like texture that forms a flawless, glassy crinkle-top every single time.
Smart Caloric and Sugar Architecture
A traditional banana split ice cream sundae can easily clock in at over 800 calories, packed with empty refined sugars, synthetic syrups, and heavy industrial preservatives. By converting this concept into a bite-sized format and utilizing the natural, structural sweetness of deeply ripened bananas within the batter, we dramatically reduce the need for excessive added refined white sugar. You get the exact same sensory satisfaction of a heavy, luxurious dessert but at a fraction of the caloric investment, with cleaner macros and zero heavy synthetic shelf-stabilizers.
The Ultimate Multi-Generational Crowd-Pleaser
This recipe solves the ultimate dinner party dilemma: satisfying completely different age groups and dietary preferences. For children, it carries the undeniable fun, color, and playfulness of a classic ice cream parlor treat. For adults, the use of high-quality Dutch-processed cocoa and a dark, sophisticated flavor profile elevates it from a simple kid’s snack into an elegant, beautiful confection perfect for wine pairings, high-end brunches, or aesthetic post-workout treats.
5. Ingredients Deep Dive
The Fat Base: High-Quality Unsalted Butter
- Why it’s used: Butter is the structural foundation of a truly fudgy brownie. Unlike vegetable oils, which remain liquid at room temperature and create a greasy texture, butter contains natural milk solids and solidifies slightly as it cools.
- Flavor & Texture Impact: It delivers a rich, unmistakable dairy backbone that rounds out the sharp bitterness of the cocoa powder. As it bakes, the water content in the butter evaporates perfectly, creating steam that helps lift the brownie slightly without making it cakey.
- Pro-Tip: Always melt your butter gently over low heat and let it cool slightly before adding it to your eggs. Hot butter will accidentally cook and scramble the eggs, ruining the emulsion.
The Cocoa Factor: Dutch-Processed Cocoa Powder
- Why it’s used: Regular natural cocoa powder is highly acidic and light in color. Dutch-processed cocoa powder has been treated with an alkalizing agent to neutralize its acidity, resulting in a dark, almost black hue and a remarkably smooth, mellow flavor profile.
- Flavor & Texture Impact: It gives these brownie bites an intensely rich, premium chocolate appearance and a deep, dark flavor that beautifully contrasts the sweet, bright fruit elements.
- Pro-Tip: Do not substitute Dutch-process with raw cacao powder or natural cocoa unless you adjust the sugar ratios; raw cacao will make the bites taste aggressively bitter and dry.
The Structural Sweetener: Deeply Speckled Bananas
- Why it’s used: We aren’t just using artificial banana flavoring; we are using real fruit. The bananas must be heavily speckled with dark brown spots, indicating that their starches have completely broken down into natural fructose and glucose.
- Flavor & Texture Impact: The mashed banana introduces a beautiful, natural ambient moisture that keeps the center of the brownie bites intensely soft and gooey for days, while infusing the batter with a genuine, aromatic fruit sweetness.
- Pro-Tip: Do not use green or perfectly yellow bananas. They lack the necessary sugar concentration and contain too much active starch, which will make your brownie bites taste chalky and dense instead of soft and fudgy.
The Shell Polish: Granulated and Light Brown Sugar
- Why it’s used: This recipe uses a precise 50/50 combination of white granulated sugar and light brown sugar. White sugar is essential for creating that iconic, shiny crinkle-skin on top of the brownie, while brown sugar contains molasses, which adds deep caramel notes and structural moisture.
- Flavor & Texture Impact: Together, they guarantee a crispy, delicate outer shell that instantly gives way to a chewy, dense, and moisture-locked interior core.
6. Equipment + Pro Tips
The Essential Tools
To execute these bites flawlessly, you must step away from traditional square baking pans. You require a heavy-gauge, non-stick mini-muffin pan (ideally 24-count). The smaller cavities maximize the surface area exposure to heat, ensuring that each individual bite develops a crisp edge while keeping the very center gooey. You also need a small trigger-release cookie scoop (about 1-tablespoon capacity) to ensure every single bite contains the exact same volume of batter, guaranteeing uniform baking times. Finally, a disposable pastry piping bag fitted with a medium star tip is essential for applying the cream topping with clean, professional precision.
Insider Culinary Secrets
- The Whisking Marathon: The secret to that beautiful, paper-thin, shiny crinkle-top on a brownie is not a chemical trick—it is a physical process. You must whisk your eggs and sugars together with absolute vigor for at least 3 to 4 minutes before adding any other ingredients. This dissolves the sugar entirely and creates a pale, fluffy foam (a ribbon stage) that rises to the surface during baking, drying out into a gorgeous, glossy skin.
- The Double-Tap Method: The moment your mini-muffin pan comes out of the hot oven, firmly slam the pan flat against your kitchen counter twice. This sudden impact forces any trapped air bubbles to collapse instantly, sinking the centers slightly to create a perfect, built-in structural crater designed to hold your banana split toppings.
Mistake Prevention Guide
The single biggest mistake bakers make when dealing with mini-muffin pans is over-baking. Because these bites are so small, the transition from a perfectly fudgy, gooey center to a dry, overcooked chocolate brick happens in less than 90 seconds. To prevent this, never rely purely on a timer. Begin checking your brownie bites at the 10-minute mark. Insert a toothpick into the center of a middle cavity; it should never come out completely clean. It should emerge with a few moist, sticky crumbs clinging to it. If it comes out clean, your brownies are already over-baked.
7. Texture & Perfection Guide
What Perfection Looks Like
A flawlessly executed Banana Split Brownie Bite is a visual study in textures. The exterior shell should feature a brilliant, shattered-glass crinkle skin that gleams under kitchen lighting. The edges should be slightly set and beautifully chewy, while the dead center remains incredibly dense, dark, and fudgy. When cut in half, you should see a clear, distinct boundary line between the chocolate brownie base, the moist pocket of real banana, and the clean, structural layers of cream and fruit topping sitting perfectly on top.
Troubleshooting Matrix
| Issue | Root Cause | Exact Fix |
| Bites are tough and cakey | Too much flour was used or the batter was aggressively over-mixed after adding dry ingredients. | Spoon your flour into the measuring cup instead of scooping directly from the bag to avoid packing it down. Fold the dry ingredients in gently using a silicone spatula just until the flour streaks disappear. |
| Bites are completely stuck to the pan | The sugar caramelized against the metal walls, or the pan wasn’t lubricated properly. | Never try to remove the bites while they are screaming hot. Let the pan cool completely for 15 minutes, then use a plastic offset spatula or a butter knife to gently twist each bite out of its cavity. |
| The tops are dull, matte, and flat | The sugar did not fully dissolve into the eggs during the initial mixing stage. | Ensure your eggs are at room temperature before whisking, and make sure you beat the sugar and egg mixture until it is thick, pale, and completely volumized before folding in your fats. |
8. Garnish & Presentation (Pinterest-Focused)
To ensure this recipe performs exceptionally well on visual search engines like Pinterest, your presentation needs to look clean, high-contrast, and highly appetizing.
- The High-Contrast Layering: Arrange the finished brownie bites on a clean, light-colored slate or white marble board. The stark contrast between the dark chocolate base, the stark white swirl of the vanilla cream, and the vibrant red of the cherry creates an immediate visual pop that stops users from scrolling past your pin.
- The Golden Hour Drizzle: Warm your chocolate and strawberry syrups slightly so they flow smoothly. Use a fork or a small squeeze bottle to apply lightning-fast, paper-thin zigzag patterns across a row of bites rather than dumping a heavy pool of syrup. This highlights the delicate, premium nature of the dessert.
9. Variations Section
- The High-Protein/Fitness Variation: Swap the traditional all-purpose flour for an equal amount of oat flour, replace the butter with continuous coconut oil, and mix a scoop of chocolate whey protein isolate directly into the dry ingredients. Top with a dollop of high-protein, zero-sugar Greek yogurt cream for a macro-friendly treat.
- The Ultimate Decadent Loaded Version: Press a single mini semi-sweet chocolate chip and a tiny cube of real fresh banana directly into the center of each individual batter cup right before it slides into the oven. This creates a hot, molten lava core that oozes out when a guest takes their first bite.
- The Vegan/Plant-Based Alternative: Replace the unsalted butter with an equal volume of refined avocado oil or vegan block butter. Substitute the two eggs with an additional ¼ cup of smooth mashed banana or a commercial flax-egg preparation, and utilize a whipped coconut cream for the final decorative topping.
- The Salted Caramel Toffee Twist: Ditch the strawberry syrup entirely. Instead, garnish the vanilla cream topping with a rich, salted amber caramel drizzle, a sprinkle of coarse Maldon sea salt flakes, and a heavy scattering of crushed English toffee bits for a deeply sophisticated, buttery flavor profile.
10. Batch, Meal Prep, & Party Scaling
- How to Scale for Large Events: If you are making these for a large wedding shower, birthday party, or backyard cookout, you can easily double or triple the ingredient measurements. However, do not let the completed batter sit out on the counter while your first batch bakes; the sugar structure will begin to break down, and you will lose the crinkle-top on subsequent batches. Bake in multiple pans simultaneously or mix the batches sequentially.
- The Smart Make-Ahead Workflow: You can bake the brownie bases up to 48 hours completely in advance of your event. Store the un-topped brownie bites in an airtight container at cool room temperature. On the day of your party, simply line them up on your serving trays and execute the cream, syrup, and cherry toppings fresh right before your guests arrive. This keeps the presentation completely flawless.
11. Common Mistakes to Avoid
- Using Cold Eggs: Cold eggs from the refrigerator will instantly seize the melted butter when mixed together, causing the fat to separate and creating a greasy, un-emulsified batter that bakes unevenly.
- Using Green Bananas: Green or firm yellow bananas do not contain enough free sugars or moisture. They will introduce a bitter, starchy flavor and dry out the interior of your brownie bites.
- Scooping Flour Directly from the Bag: This packs the flour down tightly into the measuring cup, introducing up to 30% extra flour into the recipe, which completely dries out the brownie, making it cakey and dry.
- Over-Mixing the Batter: Aggressively whisking the batter after adding the flour activates the gluten networks, turning your soft, delicate brownie bites into a tough, bread-like texture.
- Topping While Warm: Attempting to pipe your cream or place toppings onto the brownie bites while they are still warm from the oven will cause the cream to instantly liquefy, turning your beautiful presentation into a messy, watery disaster.
12. Serving Suggestions
- The Retro Birthday Party Board: Serve these bites on a massive wooden charcuterie board flanked by bowls of extra rainbow sprinkles, mini waffle cone pieces, crushed pineapples, and extra maraschino cherries, allowing your guests to fully customize their own toppings.
- The Sophisticated Date-Night Pairing: Place three beautifully garnished brownie bites on a matte-black plate alongside a glass of rich, dry Cabernet Sauvignon or an intense shot of espresso. The deep, bitter notes of the wine or coffee cut through the sweet, fruity profiles beautifully.
- The Post-Workout Reward: Keep a batch of the un-topped banana brownie bases stored in your freezer. Pop one out after an intense training session, warm it in the toaster oven for 30 seconds, and top with a scoop of clean vanilla protein ice cream for a controlled, incredibly satisfying recovery treat.
13. Pinterest & Trend Insights
This specific recipe sits at the intersection of three major structural internet trends right now:
- The Mini Dessert Obsession: Portion-controlled, bite-sized desserts consistently outperform traditional large cakes and trays on visual networks because they look pristine, elegant, and effortlessly manageable.
- Nostalgia Marketing: Retro comfort foods—especially iconic 1950s diner and soda fountain aesthetics—are experiencing a massive cultural renaissance as consumers seek comforting, familiar flavor combinations presented in modern, innovative ways.
- Real Fruit Integration: Audiences are actively moving away from purely synthetic, chemical dessert flavorings. Highlighting the use of real, whole speckled bananas for natural moisture satisfies the demand for clean, ingredient-transparent baking.
14. Final Thoughts
Baking does not have to be an intimidating, multi-hour ordeal filled with stress and specialized machinery. The beautiful simplicity of these Banana Split Brownie Bites proves that with a solid understanding of basic kitchen logic, a single mixing bowl, and a little bit of patience, you can create a world-class, multi-textured dessert right in your home kitchen. It’s about taking the timeless, comforting flavors of your childhood and presenting them with modern, elegant confidence. Fire up your oven, grab those speckled bananas on your counter, and let’s turn simple ingredients into pure dessert magic.